
FINAL
- megannejimenez
- May 1, 2019
- 3 min read
Updated: Aug 28, 2020
Going off of Lab 4, I started to create the final project based off of sketches that I had drawn up when I was first coming up with the idea, and it was super important to have these drafts to understand the individual layers.


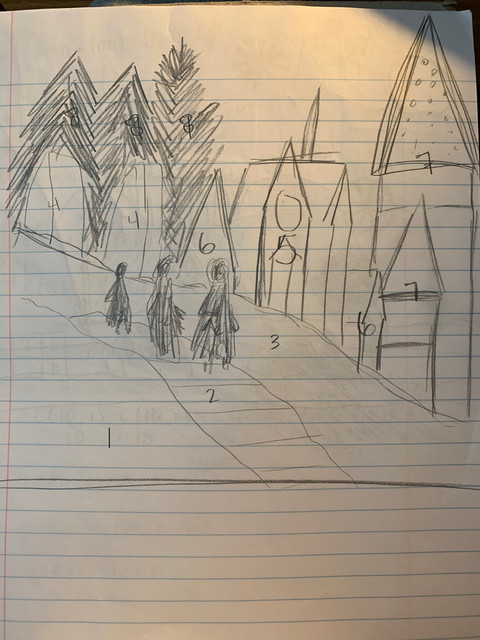
The thing that I thought I needed to do the most was go back into my illustrator file and add as much detail as possible. This was important to me because I knew that the laser cutter was going to be able to get all of those fine details, so I really wanted to capitalize on that and make sure I was still following the original prompt of the assignment, which was to make something that needed digital fabrication. So I went into the file and added more stars in the sky, as well as making the windows on the castle and the people in the boats much more detailed than before. I knew how accurate the laser cutter was going to be, so there couldn't be any mess ups in that portion of my design.

I then took the illustrator file and put it into rhino and tried to set it all up for the laser cutter, but I needed to decide on what type of paper as well as what size of paper that I was going to be using. I decided that card stock would probably be the best option, and it mostly comes in 8.5"x 11", so I decided that would be the general size for the shadow box. Then for the wood portion, aka the frame, I decided to do it in layers, so that each layer of wood acted as the spacer for the pages. This seemed like the easiest thing to do, because I was scared of measurements getting messed up for a normal box, and I needed the whole thing to fit together perfectly.

I got everything laser cut, and I was genuinely surprised at how easily the laser cutter cut the paper. Everything was so precise and perfect, and I was so glad that I took that extra time to make sure that the original artwork was near perfect. I then sanded everything, which took up so much time, and I think I might have spent too much time to the point that it was unnecessary, because it took me about three hours to do it all. Then I painted the pieces of the frame individually, waited for them to dry, then began to assemble. I started from the back and continued forward, alternating the two pieces that made up one layer of the frame and each layer of card stock. I weighed everything down each time I put a new layer on, just so the glue had the chance to cling onto everything and hopefully dry flat. Once that was done, I made the back portion of the frame, added lights and strung them through the hole through the back, and used command strips to hold the battery packs to the back of the frame.
I overall really like the outcome of my project. One thing that I wish I would've done differently is not spend so much time on sanding, especially since I ended up using paint. Another thing is that I wish that I spent more time gluing the frames and layers of paper together, because the layers don't exactly line up, and it's extremely obvious when I try to stand the whole thing up. Lastly, I wish that I would've combined the overlapped lines for the frame because it took longer to laser cut, and I think it burned the wood a lot, which also made it difficult to sand down. I think that this project turned out well for me, and I really like and am proud of what I designed and made.


Comments